Tuesday 18 June 2019

Salesforce to Salesforce Integration

The Salesforce to Salesforce integration is very powerful to share the data's among the orgs.

In this post, we are using OAuth authorization type and connected app to connect the two different salesforce organizations. In this process, we are connecting two different developer orgs. If you are looking to connect sandboxes, you can replace the endpoint URL with the test.salesforce.com instead of login.salesforce.com.

Use Case: Fetch and display the contacts for the Account from another salesforce org.
Detailed Requirement: In an Org A, place a button on the Account detail page, when the user clicks on the button, retrieve and display the contacts available for the same account from another salesforce org B. It should look for the same Account Name to retrieve the contacts.

Step 1: Create a connected app in destination org(Salesforce org B from where you want to fetch data).


In the callback URL, replace the ap15 with your salesforce org instance.

Once saved, the Client Id and Client Secret will be generated. Copy these informations for later purpose.

Step 2: Create a @RestResource class to expose the data


@RestResource(urlMapping='/displayContacts/*')
global class ExposeContactsForAccountName {

    @HTTPGET
    global static List<Contact>  exposeContacts(){
        List<Contact> conList = new List<Contact>();
        
        RestRequest reqRequest = RestContext.request;
        RestResponse resResponse = RestContext.response;
        
        //Get the Account Name from the URL
        //urlDecode to remove get the exact Account Name from the URL
        string getAccName =  EncodingUtil.urlDecode(reqRequest.requestURI.substringAfterLast('/'), 'UTF-8');
        
        //Query the Contacts for the Account name and return the list
        conList = [Select id, Name, FirstName, LastName, Email, Phone from Contact where Account.Name =: getAccName];
        return conList;
    }
}

Step 3: Create a custom button in the source org (Salesforce org A where you want to display the contacts).


Once created, place this button on the page layout.


Step 4: In the source org(Salesforce org A where you want to display the contacts on button click), create custom settings to store the callout parameters like endpoint URL, Username, Password, Client Id, Client Secret and any other hardcode values.

Create "Hierarchy" type custom settings and necessary fields.

Once completed, click on Manage to store the values.

End Point URL: https://login.salesforce.com/services/oauth2/token  (it should be 'https://test.salesforce.com/services/oauth2/token' in case of sandbox)
Username: The destination org (Org B) username
Password: The destination org (Org B) password
Client Id: Paste the client id of the connected app (Org B)
Client Secret: Paste the client secret of the connected app (Org B)

Step 5: Create a visulaforce page in the source org (Org A). Give name as "DisplayContactsFromConnected" and past the below code.

<apex:page extensions="DisplayContactsFromConnectedOrgCont" sidebar="false" showHeader="false" standardController="Account">
    <apex:slds >
        <apex:form >
            <apex:pageMessages ></apex:pageMessages>
            <apex:pageBlock >
                <apex:pageBlockButtons
location="top" >
                    <div
style="float:right;">
                        <apex:commandButton
value="Create Contacts" title="Create Contacts" oncomplete="self.close();" action="{!insertSelectedContacts}"/>
                        <apex:commandButton
value="Cancel" title="Cancel" onclick="self.close();" />
                    </div>
                </apex:pageBlockButtons>
             
                <apex:pageBlockTable
value="{!conWrapper}" var="con">
                    <apex:column
headerValue="Select">
                        <center><apex:inputCheckbox
value="{!con.selectToInsert}"  /></center>
                    </apex:column>
                    <apex:column
headerValue="First Namevalue="{!con.FirstName}"/>
                    <apex:column 
headerValue="Last Namevalue="{!con.LastName}"/>
                    <apex:column 
headerValue="Emailvalue="{!con.Email}"/>
                    <apex:column 
headerValue="Phone Numbervalue="{!con.Phone}"/>
                </apex:pageBlockTable>
             
            </apex:pageBlock>
        </apex:form>
    </apex:slds>
</apex:page>


Step 6: Create an apex class "DisplayContactsFromConnectedOrgCont".

This class will get the current page id and retrieve the account name. Once account name received, do the callout to destination salesforce org and fetch the contacts list.

public with sharing class DisplayContactsFromConnectedOrgCont {

    Public ID accountID {get;set;} //to store the account id
    Public Account acc {get;set;} //to store the account details
    Public ApexPages.StandardController accountController;
    public string endPointURL; //to store the endpointurl
    public string clientID; //to store the client id
    public string clientSecretKey; //to store the client secret key
    public string userName; //to store the username
    public string password; //to store the password
    public string access_token; //to store the access token
    public List<contactsWrapper> conWrapper {get;set;} //wrapper class list
 
    public DisplayContactsFromConnectedOrgCont(ApexPages.StandardController controller){
     
        //save the values from custom settings
        endPointURL = SFToSF__c.getInstance().End_Point_URL__c;
        clientID = SFToSF__c.getInstance().Client_Id__c;
        clientSecretKey = SFToSF__c.getInstance().Client_Secret__c;
        userName = SFToSF__c.getInstance().Username__c;
        password = SFToSF__c.getInstance().Password__c;
     
     
        accountID = ApexPages.currentPage().getParameters().get('id'); //store the current page id (Account id)
        this.acc = (Account)controller.getRecord();
        this.accountController = controller;
        conWrapper = new List<contactsWrapper>(); //initialize the wrapper class list
        Account accRec = [Select id, Name from Account where ID =: accountID]; //Query to get the Account Nae
        //do the callout and fetch the contacts from another org and load into the wrapper class list to display
        fetchContacts(accRec.Name);
    }
 
    public void fetchContacts(string AccountName){
        //Login into the destination salesforce org
        Login();
        //Once access token is recieved, call the rest api and fetch the contact details
        if(access_token != null){
            Http ht = new Http();
            HttpRequest httpReq = new HttpRequest();
            //urlEncode the Account name to send in url format. For ex: If Account Name is "Test Account", it should send as "Test+Account"
            httpReq.setEndpoint('https://ap15.salesforce.com/services/apexrest/displayContacts/'+EncodingUtil.urlEncode(AccountName, 'UTF-8'));
            httpReq.setMethod('GET');
            httpReq.setHeader('Authorization', 'Bearer '+access_token);
            httpReq.setHeader('Content-Type', 'application/json');
            httpReq.setHeader('Accept', 'application/json');
            HttpResponse httpRes = ht.send(httpReq);
            //If callout is success, then deserialize the recieved JSON data with the Wrapper Class variables
            if(httpRes.getStatusCode() == 200){
                conWrapper = (List<contactsWrapper>)JSON.deserialize(httpRes.getBody(), List<contactsWrapper>.class);
            }
        }
    }
 
    //Login and get the access token
    public void Login(){
     
        string reqBody = 'grant_type=password&client_id='+clientID+'&client_secret='+clientSecretKey+'&username='+username+'&password='+password;
        Http ht = new Http();
        HttpRequest httpReq = new HttpRequest();
        httpReq.setEndpoint(endPointURL);
        httpReq.setMethod('POST');
        httpReq.setBody(reqBody);
        HttpResponse httpRes = ht.send(httpReq);
     
        if(httpRes.getStatusCode() == 200){
            string responseBody = httpRes.getBody();
            LoginWrapper logWrap = (LoginWrapper)JSON.deserialize(responseBody, LoginWrapper.class);
            access_token = logWrap.access_token;
        }
    }
    //Insert the selected contacts into the source org under the Same Account
    Public void insertSelectedContacts(){
       List<Contact> conList = new List<Contact>();
        for(contactsWrapper cow : conWrapper){
            if(cow.selectToInsert == true){
                Contact con = new Contact();
                con.FirstName = cow.FirstName;
                con.LastName = cow.LastName;
                con.Email = cow.Email;
                con.Phone = cow.Phone;
                con.Description = 'Added from another salesforce org';
                con.AccountId = accountID;
                conList.add(con);
            }
        }
        if(!conlist.isEmpty()){
            insert conlist;
        }
    }
 
    //Wrapper class to store the access token
    Public class LoginWrapper{
        public string access_token;
    }
    //Wrapper class to store the contacts informations
    Public class contactsWrapper{
        Public boolean selectToInsert {get;set;}
        Public string FirstName {get;set;}
        Public string LastName {get;set;}
        Public string Email {get;set;}
        public string Phone {get;set;}
    }
}


We are done!. Now, go to any Account detail page and click on Display Contacts from Connected Org.


One more feature!. Select the contacts and click on Create Contacts button to insert the selected contacts under this account 💪

Comments are welcome 😉


Thursday 13 April 2017

SObject row was retrieved via SOQL without querying the requested field in Controller

I just struck with one of the issue when developing something in visualforce page.

The problem is when I load the visualforce page am seeing this below error

Error : SObject row was retrieved via SOQL without querying the requested field


I was trying to fetch the field in controller like below,

Public class caseController{

     public Case cas {get; set;}
     private ApexPages.StandardController controller {get; set;}
     public string caseOwnId{get;set;}

     public caseController(ApexPages.StandardController controller) {
        this.controller = controller;
        cas = (Case) controller.getRecord();
        string caseOwnId = cas.OwnerId;
}

When I use the string field caseOwnId in visualforce page to display the owner id, it is saying that 'SObject row was retrieved via SOQL without querying the requested field'. Isn't this weird?.

Usually, we will see this error if we missed the field while querying. right?.

After some time I found the solution for this as well. Ofcourse the solution is very new to me.

The solution is, we can add the field API name in the controller itself. see below,

controller.addFields(new List<String>{'OwnerId'});

We have method called addFields in the controller. By using that, we just need to add the api name of the field to the list. That's it. So, the full constructor would be,


Public class caseController{

     public Case cas {get; set;}
     private ApexPages.StandardController controller {get; set;}
     public string caseOwnId{get;set;}

     public caseController(ApexPages.StandardController controller) {
        this.controller = controller;
        controller.addFields(new List<String>{'OwnerId'});
        cas = (Case) controller.getRecord();
        string caseOwnId = cas.OwnerId;
}

Tuesday 3 January 2017

Case Response Time In Salesforce

I have come across the process entitlement and milestone which is very useful standard salesforce processes to respond the case and manage the case as per SLA.

Salesforce milestones can only be seen on Feed View of the Case record. But my client won't use feed view so we are in a situation to create a custom response time for the case.

Use case: There is no way to know a case with response time SLA expiring. So we need time count as per priority of the case.

We have Priorities P1, P2, P3, P4
Timeframe to respond the P1 case is 30 min
Timeframe to respond the P2 case is 2 hour
Timeframe to respond the P3 case is 8 hour 
Timeframe to respond the P4 case is 24 hour

  1. When P1 case is created I need to show the remaining time to respond the case in Custom Field of the object
  2. Remaining response time should change dynamically when page refreshes
  3. When Remaining response time count comes down to 0 min send an email alert to case owner saying that the case SLA is expired.
  4. When Case is assigned to user/owner is changed, Remaining Response time should stop wherever the count it is.
  5. Case Remaining Response Time should go in negative if SLA is expired.
  6. Format of the remaining response time should be,
                         Response Time - 30 min (because timeframe for P1 is 30 min)
                         Response Time - 1 hour 30 min (after 30 min of P2 case. Because P2 timeframe is 2 hr)
                         similarly for remaining priorities 

Solution:  Formula Field with trigger.

Custom Fields:
  1. Response Timeframe - Formula Field(Number) - Return 30 min for P1, 120 min P2, 480 for P3, 1440 for P4
  2. SLA Expiry Remaining Time - Formula Field to show dynamic time count
  3. SLA Expiry Support Field1 - Number(18,0) - To use in trigger
  4. SLA Expiry Support Field2 - Number(18,0) - To use in trigger
  5. Is Owner Changed -  Checkbox - Check when owner is changed in Trigger
  6. Owner Changed On - DateTime - Catch the DateTime when owner changed in Trigger
Response Timeframe =

IF( ISPICKVAL( Priority , 'P1') , 30, IF(ISPICKVAL( Priority , 'P2'), 120, IF(ISPICKVAL( Priority , 'P3'), 480, IF(ISPICKVAL( Priority , 'P4'), 1440, NULL) ) ) )


Trigger :

trigger caseTrigger on Case ( before insert, after insert, before update, after update) {
    
    if(trigger.isAfter && trigger.isInsert){
        List<Case> updateList = new List<case>();
        List<Id> currentcase = new List<Id>();
        for(Case caseLoop : trigger.new){
            Case myCase = trigger.new[0];
            currentcase.add(myCase.Id);
        }
        List<Case> updcase = [select id, caseResponseTime__c, CreatedDate, SLA_Expiry_Support2__c from case where id = :currentcase];
        for(Case caseLoop : updcase){
        //(((CreatedDate + ( caseResponseTime__c /1440 )) - NOW() ) * 24 * 60) / 60;
        integer responseTime = integer.valueOf(caseLoop.caseResponseTime__c);
                Long createdDate = caseLoop.CreatedDate.addMinutes(responseTime).getTime();
                Long currentDate = System.now().getTime();
                Long milliseconds = createdDate - currentDate;
                Long seconds = milliseconds / 1000;
                Long minutes = seconds / 60;
                Long hours = minutes / 60;
                caseLoop.SLA_Expiry_Support2__c = hours;
            updateList.add(caseLoop);
        }
        if(updateList.size() > 0){
           update updateList;
        }
    }
    if(trigger.isBefore && trigger.isUpdate){
        for(Case caseLoop : trigger.new){
            Case cas= trigger.oldmap.get(caseLoop.Id);
            if(caseLoop.OwnerId!= cas.OwnerId){
                caseLoop.caseOwnerChanged__c = true;
                caseLoop.caseOwnerChangedOn__c = system.now();
                
                //(((CreatedDate + ( ResponseTime__c /1440 )) - caseOwnerChangedOn__c ) * 24 * 60) / 60
                integer responseTime = integer.valueOf(caseLoop.caseResponseTime__c);
                Long createdDate = caseLoop.CreatedDate.addMinutes(responseTime).getTime();
                Long caseOwnerChangedDate = caseLoop.caseOwnerChangedOn__c.getTime();
                Long milliseconds = createdDate - caseOwnerChangedDate;
                Long seconds = milliseconds / 1000;
                Long minutes = seconds / 60;
                Long hours = minutes / 60;
                caseLoop.SLA_Expiry_Support1__c = hours;
                
            }
            else{
                caseLoop.caseOwnerChanged__c= false;
            }
        }
        
    }

Utilize the supported fields and Owner fields in main SLA Expiry Remaining Time Formula Field

SLA Expiry Remaining Time =
IF( caseOwnerChanged__c , 
IF(FLOOR(caseSLAExpirySupport1__c) = 0, 
LEFT( TEXT(MOD((((CreatedDate + ( ResponseTime__c /1440 )) - caseOwnerChangedOn__c ) * 24 * 60) ,60)),2 ) 
&' min', 
(TEXT(FLOOR(caseSLAExpirySupport1__c)) 
&' hour '& 
LEFT( TEXT(ABS(MOD((((CreatedDate + ( ResponseTime__c /1440 )) - caseOwnerChangedOn__c ) * 24 * 60) ,60))),2 ) 
&' min') 
), 

IF(FLOOR(caseSLAExpirySupport2__c) = 0, 
LEFT( TEXT(MOD((((CreatedDate + ( ResponseTime__c /1440 )) - NOW() ) * 24 * 60) ,60)),2 ) 
&' min', 
(TEXT(FLOOR(caseSLAExpirySupport2__c)) 
&' hour '& 
LEFT( TEXT(ABS(MOD((((CreatedDate + ( ResponseTime__c /1440 )) - NOW() ) * 24 * 60) ,60))),2 ) 
&' min') 

)


That's it. Now SLA Expiry Remaining Time formula field is sets up. It will change the value when time reduces.

SLA Expiry Response Time


Wednesday 28 December 2016

How To Get trigger OldMap in Future method

Have you ever ran into a situation like getting oldMap values in future call?. I ran into this situation so came here to post about "how to pass oldMap in Future method".

What is Future Method?.

future method runs in the background, asynchronously. You can call a future method for executing long-running operations, such as callouts to external Web services or any operation you'd like to run in its own thread, on its own time.

Future method can be defined using @future annotation above the method beginning.

syntax for future method,


public class className{
      @future
      public static void methodName(){

      }
}

So, coming back to passing an oldMap to future method,

Trigger

trigger AccountTrigger on Account (after update)   
 {  
     set<Id> newaccountID = new set<Id>();
     set<Id> oldaccountID = new set<Id>();
     Map<Id, String> oldAccountName = new Map<Id, String>();

     for(Account accountToProcess : Trigger.new){
         Account oldAccount = Trigger.OldMap(accountToProcess.id);
         newaccountID.add(accountToProcess.id);
         oldAccountName.put(oldAccount.id, oldAccount.Name);
         //you can have another map to put whatever fields you want from old map and pass
     }
     className.futureMethodName(accountID, oldAccountName);
 } 


Future Method


global Class className
{
    @future
    public static void futureMethodName (set<Id> newAccounId, Map<Id, String> oldAccountName)
    {
     
        list<Account> newAccList = new List<Account>();
        for(Account newAccount :[select id,Name, Type from Account where id in:newAccounId])
        {
     
                if(newAccount .Name != oldAccountName.get(newAccount.id))
                {
                    newAccount.Name = newAccount .Name+' - New Account Name';
                      newAccList.add(newAccount);
                }
         }  
         if(newAccList.size() > 0){
               update newAccList;
         }
   }


Friday 9 September 2016

Concatenate Checkbox Fields Label In Formula Field In Salesforce

      Hi folks. Feeling good to back and write something useful. So today am gonna write about formula field effects.
Scenario : I have checkbox fields for sunday, monday, tuesday, wednesday, thursday, friday and saturday. I want to show only days that are true with comma separated strings. Below picture depicts the checkboxes.
Salesforce Checkbox field
Checkboxes

I've checked Monday and Thursday checkboxes. So output should be Moday, Thursday. 

Go to fields -> Create new fields -> Formula Field. I'm gonna call it as "True Days"

So do the formula now to bind only true days,

True_Days__c =

IF(Sunday__c, 'Sunday' & IF( 
OR(Monday__c, Tuesday__c, Wednesday__c, Thursday__c, Friday__c, Saturday__c), ',', '' 
), '') & 
IF(Monday__c, 'Monday' & IF( 
OR(Tuesday__c, Wednesday__c, Thursday__c, Friday__c, Saturday__c), ',', '' 
), '') & 
IF(Tuesday__c, 'Tuesday' & IF( 
OR(Wednesday__c, Thursday__c, Friday__c, Saturday__c), ',', '' 
), '') & 
IF(Wednesday__c, 'Wednesday' & IF( 
OR(Thursday__c, Friday__c, Saturday__c), ',', '' 
), '') & 
IF(Thursday__c, 'Thursday' & IF( 
OR(Friday__c, Saturday__c), ',', '' 
), '') & 
IF(Friday__c, 'Friday' & IF(Saturday__c, ',', ''), '') & 
IF(Saturday__c, 'Saturday', '')


From above formula field, we are just binding only the true values. Now save the field and see the formula field in detail page. Magic happened. It is not appending comma's before and after the strings.

formula field
Formula Field


put your thoughts in comments. Thanks!.

Thursday 18 February 2016

Site.com With Communities In Salesforce

           This document is to provide clear view of how to customize site.com to use in community. This document is well prepared from overview and basics of site.com to publishing pages to community.


1.     Introduction to Site.com

Site.com is a Web content management system (CMS) that makes it easy to build dynamic, data-driven Web pages quickly, edit content in real time, and manage wer websites. Site administrators and designers can create and style Web pages, and add features such as navigation menus, images, and text areas using drag-and-drop page elements, while ensuring the site's pages match the look and feel of the company's brand.
Navigation :  1) Setup -> Go to site.com app at top right corner -> click on site.com tab.
   2) Setup -> Type All Communities -> Click on All Communities -> Click Manage          for the community to setup site.com -> Expand Administration -> Scroll down            and Click on Pages -> Click on Go to Site.com.

1.1. Overview

After redirecting to site.com we will be able to see the page like below.
site.com

SiteCom-Overview.PNG
Now we will see the functionalities one by one.
Number
Name
Functionality
1
Overview Tab
Tab is used to show the current page in site.com. Overview is a home page for site.com. When we click on any other items from the left menu it will appear in a separate tab.
2
Import
Import button is used to import any files such as images, videos, documents. The maximum import file size is 50 MB, but we can import a .zip file of up to 200 MB if we unzip it during import.
3
New
“New” is used to add a new page to our site.com. We can either create a site.com page by clicking on “Site Page” or we can add custom links to create a page by clicking on “Site Map Link”. We must add http:// or https:// before url of the link inorder to see the page.

4
Site Pages
Site Pages Navigation is used to Create site pages, open and edit pages, access page options, create site map links, and organize the site map. We can also switch between the default site map view and the list view .
5
Page Templates
Page Templates is used to Create page templates to base wer site pages on, open and edit existing templates, and access template options. This is like a “Master Page” in DotNet.
6
Style Sheets
Style Sheets is used to Edit the site’s style sheet or create new style sheets
7
Assets
Assets is used to import and manage files such as images, documents, videos and scripts
8
Widgets
Widgets is used to build custom widgets that are reusable throughout the site. For ex, we can group multiple images and create a widget that widget can be placed anywhere in the site.
9
Trash Can
Trash can is used to retrieve deleted items. When we delete a page, template, stylesheet, or asset, it goes into the trash can. Deleted items remain in the trash can indefinitely. Retrieved items are restored to their original location. If the original location no longer exists, they are restored to the top-level root directory
10
Change History
Change History is used to view information about recently published files with descriptions.
11
Site Configuration
Site Configuration is used to configure site properties, add IP restrictions, create URL redirects, manage domain information, manage user roles, and add and manage site languages
12
Publish Changes
Publish Changes is used to Publish the recent changes made in the site. Changes will appear in the site when only those changes are published.
13
Preview
Preview is used to Preview the Site.
14
site.com settings

This is used to duplicate or export the site, overwrite the site with a version from sandbox, or create a new site.

2. Creating a Site Page Template

Page Template is a Master Page for our Site. Master Page should contain Header, Content and Footer. Site.com Allow us to choose different templates.
1.       Click on “New Page Template” on the top.
2.       Choose existing template to modify the page template or create new one by clicking on Lawets. If we click on lawets then site.com suggest some templates to create our own page template.
3.       After Choosing the lawet template we can also choose lawet mode that will give extra functionality to our site. If we choose “Full Width” then wer site will appear in 100% width of windows. If we choose “Fixed Width” the wer site will appear in a specified width(custom width for site).
4.       Click on Create(For below page template creation “Blank Page is choosed”).
5.       Every Master Page should have Header, Content and Footer. So we will start by adding header, content and footer.  Before we going to create a template we need to know the page elements and its functionalities. Click on Actions
site.com Page Actions
                          -> Add Page Element -> Now we will be able to see all the Elements that can be                                  added for the Page. Below is the list of page elements and its functionalities.
Page Elements Name
Description
Content Block
It contains text, images, media and hyperlinks. We can add  all of the above to our page using “content block”.
Custom Code
“Custom Code” lets us write our own custom markup language like HTML, CSS and Javascript. If any of the element is not available in site.com for our requirement then we can add custom code to create element.
Image
We can add “Images” that are present in assets or we can upload and use directly to our page
Breadcrumb
A “breadcrumb” is a type of secondary navigation scheme that reveals the user's location in a website or Web application.
Menu
Creates a menu that lets users navigate through the pages of our site.
Panel
Adds structure to the page and lets we group other page elements together. Other word for Panel is “DIV” in HTML.
Button
Adds a button to the page. We can use the actions in the Events pane to add functionality to the button.
Form
Lets us to create web-to-lead forms or gather customer feedback, and submit the data to Salesforce objects.
Input Fields
Provides several field types to add to forms or pages. When added to a form, binds to fields in the form’s object.
Data Element
Data Element must be contained in a data repeater. Binds to a field in the data repeater’s object and acts as a placeholder that shows the content of a specified field for the current record
Data Function
Connects to a standard or custom Salesforce object, performs calculations on the returned results, and displays the calculation on the page.
Data Repeater
Connects to a Salesforce object and returns a dataset based on filters that we specify. Combines with data elements or custom code page elements to display the results on the page
Data Table
Connects to a standard or custom Salesforce object, retrieves a data set based on the filter criteria that we specify, and displays one or more record as rows in the table.

To add Master Page(Header, Content and Footer) we need to use 3 “Panels”(div).
6.        Click on Page Actions from left menu
                          -> Add Page Elements -> Drag and Drop Panel for Header from the elements                                      window. Continue the same method for Content Div and Footer Div. We can also do                            the custom height and width css by after pressing the panel.
7.       To write custom css for Header Panel(div)  Click on Header Panel -> Click on CSS Editor(Watermark symbol)
site.com css editor
                         from top right corner -> Click on “Code” and write own CSS for height of the Panel                            or Click on Visual to perform styling without css coding.
8.       Repeat the step no. 7 for content panel and footer panel. Specify the colors and add logo image using image page element on header.
9.       Add copyright by using “Content Block” in Footer Panel.
Now Page Template will look like this


3. Creating a Site Pages

Site Pages is used to show different pages for our site. We have created Page Template. Now by using page template create site pages.
1.       On the Overview tab, hover over Site Pages and click “New”.
2.       Type the Name for the Page Name(Home Page).
3.       Click Page Template and Choose the Template.
4.       Click on Create.
5.       We need to unlock the content panel to make changes. Click div#content  -> Actions - > Override Parent Content.
6.       Click Ok at the override message.
7.       Select div#secondaryContent  -> Actions  -> Add Page Elements > Content Block.
8.       Double-click the content block to open the page editor.
9.       Write something in Home Page.
10.   Now the Home Page will look like this
11.   Repeat the above steps to create other pages. We can also use other elements for different page like forms, widgets, Buttons, custom code, data services.
12.   Url for site.com is,
 https://mydomain.force.com/s
s – “s” in url defines that the page is created using site.com
If user redirects to Home page, then url will be
https://mydomain.force.com/s/Home

4. Use Site.com With Community

Use Site.com to customize community pages. We can create site.com pages and publish those pages to community.
Navigation :  From Setup -> Type All Communities -> Click on All Communities -> Click Manage for the community to setup site.com -> Expand Administration -> Scroll down and Click on Pages -> Click on Go to Site.com link. It will redirect to site.com studio.
1.       Now Create Page Template.
2.       Create Site Pages.
3.       After completing those steps click on “Publish Changes”
site.com publish pages
 on top right corner.
4.       If you have made any changes it will prompt us with two options that are “Site wide changes” and “Only Selected items”. Site wide changes Includes all changes made to the site since the last time it was published. Only Selected items Publishes only the items we select. Click on Next -> Next -> Publish. Now Administrator will receive email with link for published site.
5.       Copy the link for later use.
6.       Go to salesforce org. From setup -> Type Tabs -> Go to Web Tab -> Click on New Web Tab -> Enter label for Tab -> Paste the URL under URL section -> Click Save.
7.       Now Go to Community -> Administration -> Tabs -> Add the created web tab to Selected Tab ->Click on Save.

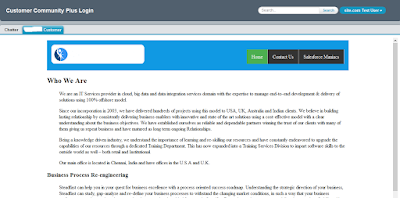
8.        Login to community. Now we will be able to see the tab if the logged in user has permission.   Check below image for community with site.com.